

Last October, I was looking on Pinterest and came across this post.

Which of course got my attention. Her brick exterior was very similar to mine and I loved the way hers turned out.
After doing some research, I realized the best temperature in which to lime wash your house is between 50 and 90 degrees. Because it was the right temperature being autumn, and is a really inexpensive project, I was able to convince my husband to let me do it and I started right away.
For this, all you need is a mason brush, small paintbrush, bucket, and dehydrated lyme. I made a point to discover where everything would be located in Lowe's before we went and it still took a long time to find the bag of dehydrated lyme. They only had one brand and it didn't match what was on the website. After finally getting the attention of an associate (who kept pretending to talk on his phone every time we approached) we discovered the bag that just said lyme on it was what we needed.*
 |
I started in the backyard just so I could figure out what exactly I was doing. I would suggest going over the mortar with a heavier ratio of lyme wash to water. That does take a while because it is a lot of detail work, but it gives it a cleaner look.
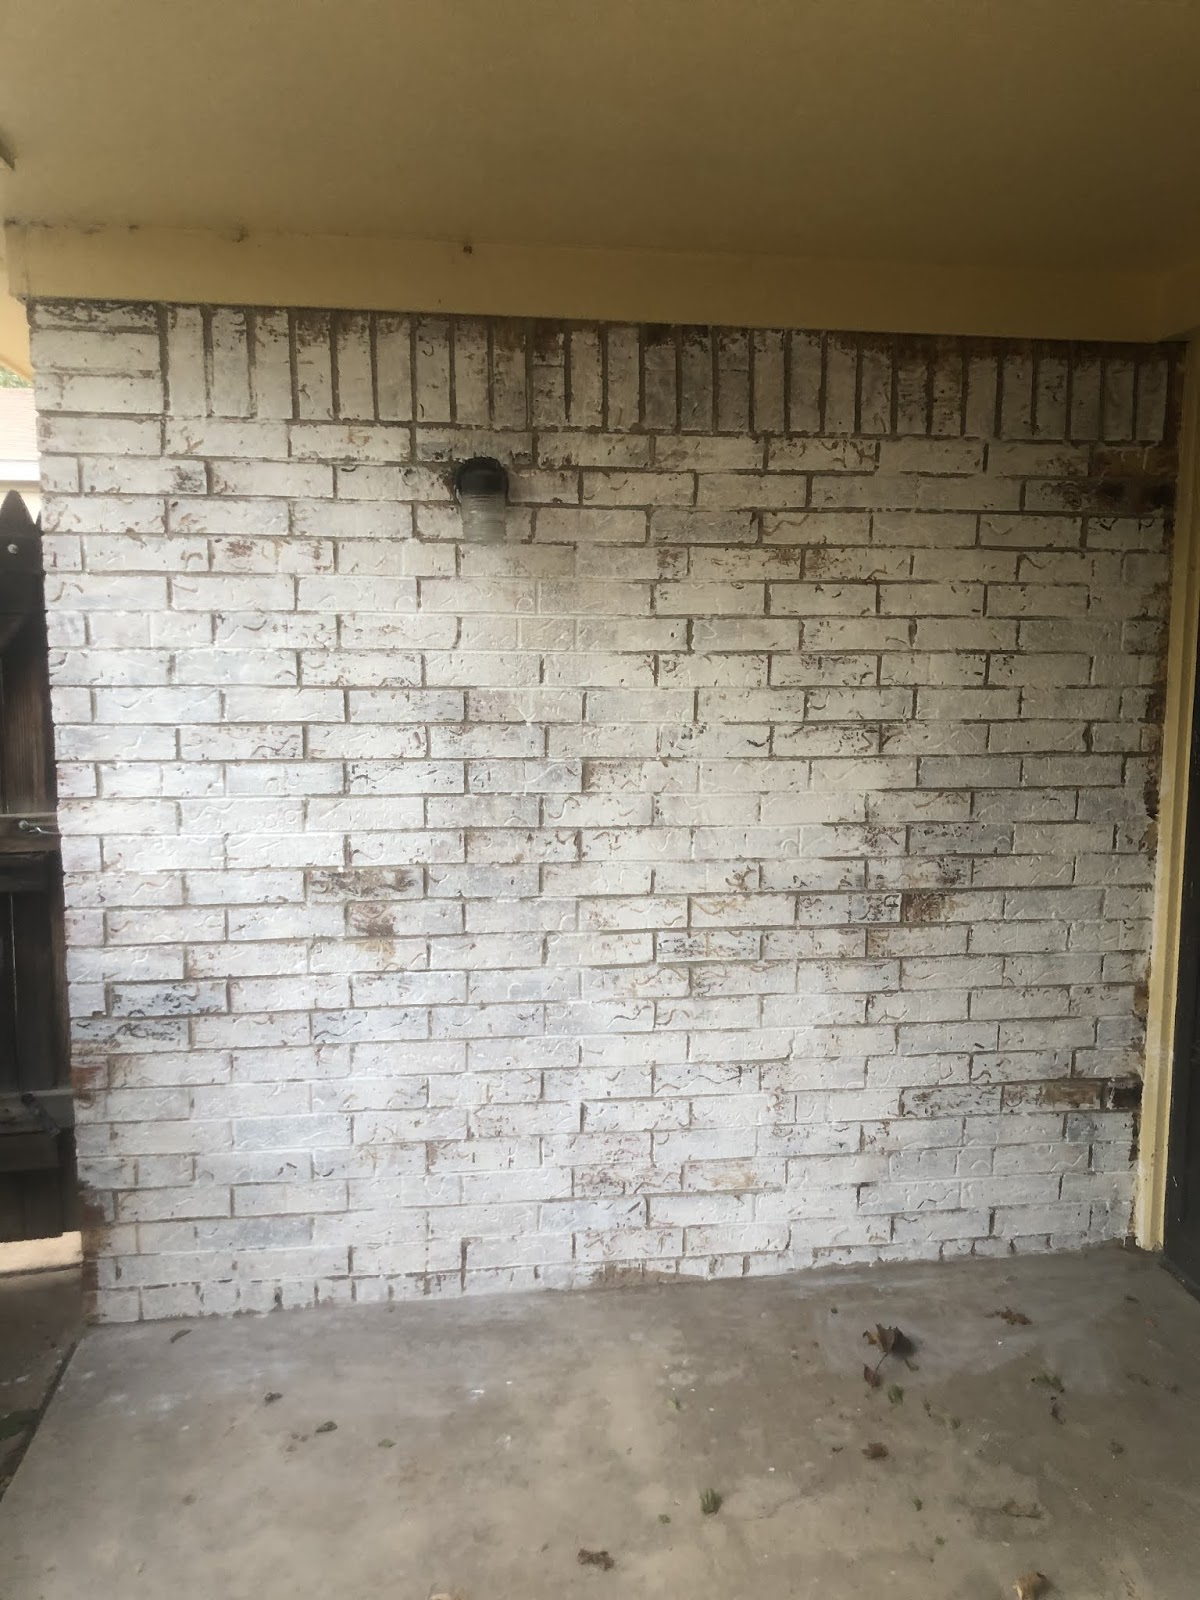 |
| Without mortar painted |
I worked in sections at a time. I went over the mortar and then when I was done with that ratio, I made a lighter ratio and used the mason brush to go over the brick in a diagonal motion. I don't remember the exact ratio, but for the mortar I would say lime to water ratio is 2/3 and for the bricks it would be 3/7.
This is very friendly for beginner DIYers; however there were a couple of difficulties. I learned the hard way that you need to wear protective clothing such as gloves because lyme wash is horrible to your skin. I had some very rugged hands at the end of it. Also, I had very large bushes on the side of my house that gave me so many scratches. I looked rough. Finally, this project depends on specific weather. It snowed in between days of me working on this and when it was finally about the right temperature, I still had to work with snow run off. Many layers of clothing did not prepare me for the damp cold.


I also found a way to make shutters out of pallets; our windows were too long so I went to the next best thing, fence posts. I originally wanted the pallets to have a natural wood look. The fence posts were all different colors and I didn't like the way it looked.

I went with a green color that was mixed a little lighter than I hoped for but it sure does bring out my cat's eyes.

I went with a green color that was mixed a little lighter than I hoped for but it sure does bring out my cat's eyes.
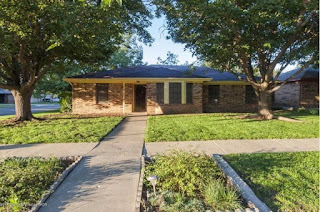
Here is the end result so far. I need to go over the trim with a second coat of paint, and some landscaping needs to happen, but that will come at a later date when I am done** with the interior.
 |
| before |
 |
| without shutters |

with shutters
*I included this anecdote in case you wanted to do this and were trying to find the bag.
** Aaron thinks I will never be done making over the inside
Paint used:
Siding: Smoky Topaz
Shutter: Farm Fresh
Actual helpful tutorials:
Great Blog. This information is useful for everyone. Thanks for sharing this kind of information
ReplyDeletehttps://www.lcrenovation.co.uk/house-extension-in-elephant/
House Renovations in Elephant